Argo tunnel is free for anyone who sign-up for CloudFlare Argo services, which is $5+/months. With Argo Tunnel, you can perform speed test from difference regions, compatibility for a new site, access to lock down an internal application without the use of a VPN and many more. If you are new and didn’t have ideas of setup Argo Tunnel, this tutorial is good for you to get a start with the configuration.
Step 1: Download and Install Cloudflared
First of all, you need to download and install the cloudflared on your server. To run the Argo Tunnel you will need to install the cloudflared on your machine. It’s available for difference kinds of machine including amd64, x86, and ARMx6. At here, I’ll covered for the machines that are using Linux. If you are using difference machine like mac OS or Windows, you can find it here.
# CentOS
wget -O /tmp/cloudflared-stable-linux-amd64.rpm https://bin.equinox.io/c/VdrWdbjqyF/cloudflared-stable-linux-amd64.rpm
rpm -ivh /tmp/cloudflared-stable-linux-amd64.rpm

# Ubuntu
wget -O /tmp/cloudflared-stable-linux-amd64.deb https://bin.equinox.io/c/VdrWdbjqyF/cloudflared-stable-linux-amd64.deb
dpkg -i /tmp/cloudflared-stable-linux-amd64.deb
Step 2: Verify Your Cloudflared
To make sure it’s properly installed, the cloudflared on your machine. You can check it by using the followings command.
/usr/local/bin/cloudflared --versionStep 3: Authorize Argo Tunnel To Access Your Domain
Then, you need to allow Argo Tunnel to access your DNS zone. To authorize it, you will need to run the command below.
cloudflared tunnel loginOnce you run the command, you will receive an URL.

To allow it, copy the URL from there and open it to your browser and select the domain you would like to authorize. Here, I would authorize it to change my jorcus.com DNS zone.
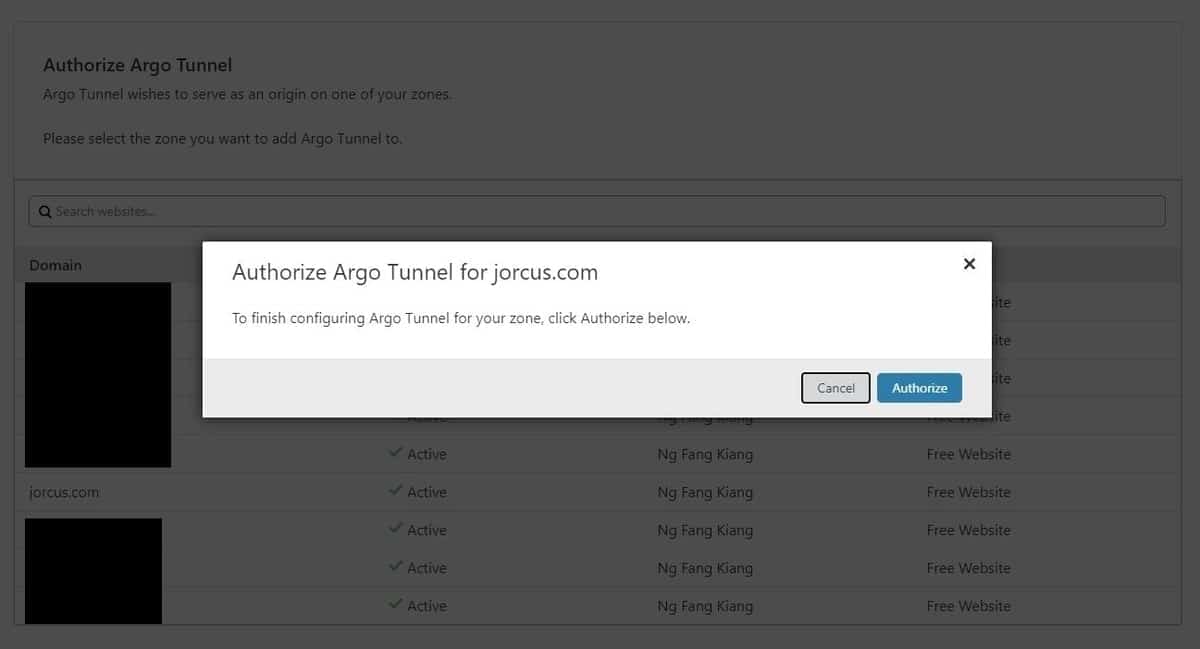
Once the domain has been authorized. You will receive a message that said you have successfully logged in and it will automatically install a certificate to the specific host name you have allowed and allow CloudFlare network for that host name.

Step 4: Start the Tunnel
You can start Argo Tunnel immediately with this command. It will generate a link from a random site. By default, it will run at port 8080.
cloudflared tunnelIf you which to use Argo Tunnel for your own domain/sub-domain. Use this command, replace the HOSTNAME.DOMAIN.COM with the domain or sub-domain that you already authorized in Step 3. The domain or sub-domain must not be used for something else, otherwise you may get an error. If you which to change the port, then you can set the localhost with a specific port. At here, I use port 8000.
cloudflared tunnel --hostname HOSTNAME.DOMAIN.COM http://localhost:8000If you get an error for that, it might because of you already have existing DNS A/AAAA record for that domain/sub-domain. You should delete that A/AAAA records and create a fresh one with another domain/sub-domain that are not used for anything.
Step 5: Test It!
Once you have completed everything, you can now enter the URL you have configured to your website. It will appear default page of your web hosting.